Showing posts with label Recipes. Show all posts
Wednesday, January 11, 2012
Crawfish Étouffée
In French, the word "étouffée" means, literally, "smothered" or "suffocated", from the verb "étouffer". In Louisiana, to "smother" food means to simmer it in a small amount of liquid with lots of seasonings and spices to create a gravy or thick sauce that is served over rice. This is a favorite special occasion meal in New Orleans. Mme. Grande (my mother-in-law, and New Orleans native) was kind enough to share it with me to share with you. Her recipe is adapted from the Mr.'s cousin, Alexis's grandmother, Mrs. Wray Edward Robinson (and featured in the Junior League of Baton Rouge cookbook, River Road Recipes II, A Second Helping). There is nothing better than a secret family recipe sans the secret.
If this is your first time trying your hand at Cajun cuisine, let me just warn you this recipe is a bit challenging. But you have to start somewhere and mastering the art of a dark brown roux is great place to begin. The rich delicious final product is totally worth it, I promise!! It will be the show stealer at your next Mardi Gras fête.
Good luck!
Ingredients
1 pound of butter (4 sticks)
1 cup flour
*3 bell peppers finely chopped
*2 bunches green onions finely chopped
*1 stalk of celery finely chopped
1 pound of can tomatoes
3 teaspoons garlic powder
3 tablespoons salt
3 tablespoons Worcestershire sauce
3 teaspoons of cayenne pepper
6 cups water
5 pounds crawfish tails
4 cups rice
*If you are short on time, just use two packs of the trinity- bell pepper, onion, and celery used together are known as the "holy trinity" of Cajun cuisine. It is sold pre-chopped at most Southern grocery stores.
Melt butter in a large dutch oven. Add flour and stir constantly to make a deep brown roux (about 45 minutes). Be very careful not to burn. Medium low heat is best, but use your best judgment to make sure it is cooking well without overheating. It will be different with each stove. It should look like this at the end.
Add peppers, onion, celery and tomatoes to the roux. Add seasoning. Cover and cook slowly for one hour stirring frequently to prevent sticking (medium to medium low heat, but again use your best judgment to make sure it is cooking without burning). Add water and cook slowly for an hour and a half to two hours. Add crawfish tails and cook about 30 minutes. Next, cook the rice.
Serve rice in individual bowls and spoon crawfish étouffée on top (usually about a 1:1 ratio).
Serves 12.
Oh and one little confession - I haven't actually tried to make this quite yet, but I was given very specific instructions by Mme. Grande. I will give it a whirl and update with my results asap.
Bon Appétit. Back to Paris in less than 5 days!! (And I promise I will stop neglecting this blog).
Images: 1) via pinterest
Labels:
Recipes
Thursday, December 8, 2011
White Truffle Popcorn
The first thing we always ask my friend R when she gets back from a movie date is simple and the answer is determinative: Did he offer to buy you popcorn? Yes means a second date is still in the realm of possibility. No means she will be ignoring all future texts. The logic is actually quite sound: if they guy is too cheap to spring for overpriced snacks at the movies, while on a date, he's probably not going to be willing to spring for anything, ever. Secondly, and more importantly, if it's not about the money and the guy just doesn't like a good healthy amount of snacking, then he just doesn't have a prayer. The same logic goes for ordering appetizers and desserts at a restaurant, as well.
Anyway.....so, popcorn. I love popcorn and anything with truffle oil. The two combined equal my new favorite late afternoon snack. I don't know about you, but I find it completely impossible to get from lunch to dinner with a little snack in between... or two.
White Truffle Popcorn
Pop a bag of low cal popcorn and add a few drizzles of white truffle oil, salt and pepper and shake it all up in the bag. That's it! You could also add some shaved parmesean to glitz it up for a perfect party nibbler.
A luxurious treat on an overcast day in Paris.
Labels:
Recipes
Friday, December 2, 2011
The Secret to How French Girls Stay So Skinny
Just kidding. I have no idea on that one. It truly baffles me. This is definitely not a skinny girl post.
Three years ago the Mr. gave me cooking classes for my birthday. It was really a very sweet gift. He spent a lot of time researching cooking classes in DC (where we lived at the time) and put together a binder with several different options. As usual, life got busy and we never got around doing it. But a gift lover never forgets. So, I decided to cash in my present....in Paris, of course! Over the next couple of months I am going to try a few different cooking classes and share the results (hopefully this will be helpful for you foodies that may want to try a class yourself on your next jaunt over) .
I took my first class yesterday at La Cuisine Paris. I chose La Cuisine Paris for several reasons, with the most important being that the classes were in English. I also wanted a cooking, not baking, class. Finally, they offered a class covering French bistro basics, my favorite.
The Menu
Magret de Canard aux Figues
Roasted Vegetables
Crêpes et sa Sauce au Caramel Beurre Salé
Overall, I thoroughly enjoyed the class. I met some really nice people and loved testing out our creation over a bottle of white Burgundy after the class was over.
A few things I didn't love : 1) they seriously skimped on the food (there was not enough duck to go around); 2) the chef seemed to have a hard time fitting everything into the two hour class, making it a little stressful and crowded around the one stove shared by 12 people, and; 3) finally, the biggest disappointment - the caramel sauce (if you can call it that) was terrible. I expected a little (lot) more out of a seasoned French chef.
Overall, I would give this class a B-. The duck was fabulous and I love that I now know how to make crepes. I have included to duck recipe below. It's really pretty easy to do. The hardest part for my US readers will be finding the cut of meat. In French grocery stores it is readily available, but other Americans in the class mentioned that it is hard to find in US and your best bet is to make friends with your butcher.
Magret de Canard aux Figues (Duck Breast with Fig Sauce)
Ingredients
1 magret de canard = 2 people.
Fresh or dried figs (depending on the season), sliced with stem removed
Fresh rosemary, stem removed (6 to 8 stems or a big handful)
Drizzle of honey
1/2 cup or so of balsamic vinegar
Salt and pepper
In the French fashion, the recipe is not very exact :) But, after all, creativity makes for the best chefs.
The magret de canard comes with a layer of fat. Do not reomve! This is what gives it all the flavor. Instead, use a pairing knife to cut diagonal slits vertically into the fat, continue to make slits down the entire piece of meat (about every inch). IMPORTANT: cut through the fat but just to the meat, do not piece the meat. Criss cross with slits going the other direction. Season the other side of the meat with salt and pepper. Next, combine rosemary, fig slices and honey in a small bowl.
Place breast in a deep saute pan, fat side down, and cook for about 10 minutes on medium high heat. After 5 minutes, remove the breasts from the pan and discard the excess fat (there will be a lot...the chef old us this is not good fat that you can keep and reuse, but then again... she didn't really know how to make a caramel sauce so I don't know if I believe her). Return the canard to the pan, meat side down and add the rosemary mixture and a splash or two of balsamic vinegar. Stir to coat the meat and let simmer to reduce the sauce for about 5 minutes. Then all you have to do is serve it up, killing it at your next dinner party.
Illustration's via: (1) Doitinparis; (2) Ann Shen
Three years ago the Mr. gave me cooking classes for my birthday. It was really a very sweet gift. He spent a lot of time researching cooking classes in DC (where we lived at the time) and put together a binder with several different options. As usual, life got busy and we never got around doing it. But a gift lover never forgets. So, I decided to cash in my present....in Paris, of course! Over the next couple of months I am going to try a few different cooking classes and share the results (hopefully this will be helpful for you foodies that may want to try a class yourself on your next jaunt over) .
I took my first class yesterday at La Cuisine Paris. I chose La Cuisine Paris for several reasons, with the most important being that the classes were in English. I also wanted a cooking, not baking, class. Finally, they offered a class covering French bistro basics, my favorite.
The Menu
Magret de Canard aux Figues
Roasted Vegetables
Crêpes et sa Sauce au Caramel Beurre Salé
![]() |
A few things I didn't love : 1) they seriously skimped on the food (there was not enough duck to go around); 2) the chef seemed to have a hard time fitting everything into the two hour class, making it a little stressful and crowded around the one stove shared by 12 people, and; 3) finally, the biggest disappointment - the caramel sauce (if you can call it that) was terrible. I expected a little (lot) more out of a seasoned French chef.
Overall, I would give this class a B-. The duck was fabulous and I love that I now know how to make crepes. I have included to duck recipe below. It's really pretty easy to do. The hardest part for my US readers will be finding the cut of meat. In French grocery stores it is readily available, but other Americans in the class mentioned that it is hard to find in US and your best bet is to make friends with your butcher.
Magret de Canard aux Figues (Duck Breast with Fig Sauce)
Ingredients
1 magret de canard = 2 people.
Fresh or dried figs (depending on the season), sliced with stem removed
Fresh rosemary, stem removed (6 to 8 stems or a big handful)
Drizzle of honey
1/2 cup or so of balsamic vinegar
Salt and pepper
In the French fashion, the recipe is not very exact :) But, after all, creativity makes for the best chefs.
The magret de canard comes with a layer of fat. Do not reomve! This is what gives it all the flavor. Instead, use a pairing knife to cut diagonal slits vertically into the fat, continue to make slits down the entire piece of meat (about every inch). IMPORTANT: cut through the fat but just to the meat, do not piece the meat. Criss cross with slits going the other direction. Season the other side of the meat with salt and pepper. Next, combine rosemary, fig slices and honey in a small bowl.
Place breast in a deep saute pan, fat side down, and cook for about 10 minutes on medium high heat. After 5 minutes, remove the breasts from the pan and discard the excess fat (there will be a lot...the chef old us this is not good fat that you can keep and reuse, but then again... she didn't really know how to make a caramel sauce so I don't know if I believe her). Return the canard to the pan, meat side down and add the rosemary mixture and a splash or two of balsamic vinegar. Stir to coat the meat and let simmer to reduce the sauce for about 5 minutes. Then all you have to do is serve it up, killing it at your next dinner party.
Illustration's via: (1) Doitinparis; (2) Ann Shen
Labels:
Cooking classes,
Recipes
Wednesday, November 23, 2011
Cheesecake, Dark Chocolate and Caramel Beurre Sale: Let The Holidays Begin....
The holidays are here. A time when family and friends join together and throw all dietary inhibitions to the wind in the spirit of giving thanks. We're kicking it off with this salty piece of caramel deliciousness at our house.
You are going to love and hate me for this one. Love me because this is the best (and easiest) cheesecake ever... hate me because you are now hungry.
I adapted this recipe from one of my favorite blogs, Joy the Baker. It is hands down the easiest cheesecake I've ever made. No special cheesecake pan. No separate pan for water. Even if you don't like dark chocolate or salted caramel, no problem. Just sub in your favorites.
This bad boy is going to be one of the star attractions at our Thanksgiving feast for two.
Cheesecake Pie with Dark Chocolate Ganache and Caramel Beurre Sale
Ingredients
Makes one 9-inch pie
For the Crust:
2 cups ginger snap cookie crumbs (I used the French equivalent of speculous)
1/2 stick (4 tablespoons) unsalted butter, melted
*Note, if you are in a rush, use a pre-made crust that you can pick up in the grocery store on the baking aisle.
For the Cheesecake:
1 pound (2 blocks) cream cheese, at room temp.
1 1/3 cup of granulated sugar
2 teaspoons pure vanilla extract
2 eggs at room temp.
1/2 cup and 2 tablespoons heavy cream
For Dark Chocolate Ganache:
4 oz. dark chocolate, coarsely chopped
1 tablespoon heavy cream
1/4 cup (4 tablespoons) unsalted butter, cut into pieces
2 teaspoon light corn syrup
For the Caramel Beurre Sale:
2 tablespoons water
2 tablespoons light corn syrup
1/2 cup granulated sugar
1/3 cup heavy cream
2 tablespoons unsalted butter
1/2 teaspoons sea salt (fleur de sel if you can get it!)
Preheat oven to 350 degrees F. You'll need a 9-inch pie plate. To make the crust, place cookies in the bowl of a food processor and grind to a fine crumb. (If you don’t have a food processor you can crumble cookies in a zip lock bag). Once you’ve created a fine crumb, add the butter and mix together until thoroughly combined. Pour the mixture into a 9-inch pie plate and press with fingers until sides and bottom are evenly coated with crust. Bake for 10 minutes until golden brown. Remove from the oven and allow to cool while you make the cheesecake filling. (Eliminate this process if using a pre-made crust). Reduce the oven temperature to 325 degrees F. To make the cheesecake filling: In a mixing bowl, beat together cream cheese and granulated sugar until light and fluffy, about 3 minutes. (An electric mixer would be easier but a whisk will work as well). Beat in salt and vanilla extract until well incorporated. Add eggs. Once creamy and smooth, slowly beat in the cream, beating until smooth. Pour cheesecake mixture into the prepared cheesecake crust. Bake cheesecake for 45-50 minutes. When cheesecake doesn’t have a loose giggle in the center, turn oven off and prop the oven open slightly. Let cheesecake rest for another 45 minutes in the cooling oven. Remove from the oven and cool completely in the fridge for at least 4 hours. Overnight is best. It should look something like this....
While cheesecake cools, make the caramel beurre sale so it can cool as well. In my opinion, this is the hardest part. BUT, once you conquer it, you will have the perfect Christmas gift... make a lot, pour into jars and cutify with labels and ribbon. It took me two tries. So, here we go....add sugar, water, and corn syrup to a medium saucepan. Bring to a boil over medium heat, stirring occasionally. Bring to a boil and allow to brown. Don't get bored and walk away from the stove!! This may happen if you do that.... 

Instead, it should look like this....
Once sugar has browned to a medium amber color (like photo above) remove from heat and immediately add heavy cream and butter. Mixture will boil and foam. Stir well. Mine had a few lumps which I just discarded. Add salt and stir well to incorporate. It will look like this.
It may seem thin… that’s ok. Place in a bowl. Cover with plastic wrap and cool in the fridge for at least 4 hours, overnight is best.
Fast forward to four hours later (or the next day if you let it sit overnight) and you are ready to make the last piece of the puzzle, the dark chocolate ganache. Combine chocolate, butter, heavy cream and corn syrup in a mixing bowl and microwave at 30-second intervals, stirring until smooth. Cool for 10 minutes. Spread over the cheesecake and pop back in the fridge for another 10 minutes.
Drizzle the caramel over the cooled dark chocolate ganache, return to the refrigerator until ready to serve. Slice and serve with extra caramel at the table to pass. Bon appetite!
Labels:
Recipes
Sunday, October 30, 2011
Vin Chaud
One of my favorite things about Paris in the winter is vin chaud. It's a hot mulled wine that makes even the coldest, rainiest days a little warmer. My favorite way to enjoy this spicy beverage is strolling along the Seine or at a little cafe in Montmarte, but tonight it's a cozy night at home carving pumpkins and addressing Christmas cards. What better excuse to try my hand at the tasty treat?
Vin Chaud
Ingredients
2 bottles of red wine
Zest of 1 orange
Zest of 1 lemon
1 cup sugar
1 tablespoon cinnamon
1/2 tablespoon finely ground black pepper
1/2 tablespoon cloves
freshly grated nutmeg (as much as you would like)
Squeeze of honey
In a large saucepan, combine the red wine with the sugar and the orange and lemon zests. Add spices. Bring the wine to a very slow simmer over moderate heat, stirring to dissolve the sugar. Let the wine and spices simmer on low to infuse with flavor (15 minutes to hour). Ladle the spiced wine into heatproof glasses and serve at once. (Adjust sugar to taste. If it is too sweet, add some lemon juice).
I love the kick that the pepper gives it. It's that same tingle you get from Starbucks chai tea.... my favorite during this time of year.
Enjoy!
*Adapted from John Besh recipe
Labels:
Recipes
Friday, September 16, 2011
Le Madeleine
There is nothing as quintessentially French in my eyes as Le Madeleine. A delicious little tea cake of sorts that can be spiced up or down according to each his own. From savory or dipped in chocolate to green tea infused, Madeleines are a blank canvas begging for creativity.
With my spatula in hand and new madeleine tin (that I paid way too much money for just to say it came from Paris) I decided to try my hand at this quintessential French treat. Using all of my creative juices, I finally came up with the perfect Madeleine recipe twist: vanilla. (Hold on to your seats, folks).
Almond Glazed French Vanilla Madeleines
Doesn't putting the word French in front of vanilla always make it sound so much more exotic? What is French vanilla anyway? Is the vanilla from France better than other vanilla around the world? Who knows... but since I live here I'll go with it.
Ingredients
1 stick of unsalted butter, melted and cooled to room temperature
2/3 cup granulated sugar
3 eggs (at room temperatur, important! (trick - if you forget to put them out hours early {who ever remembers to do that?} put them in a bowl of warm water for 5 minutes to bring them to room temp).
1 cup flour (sifted... so they say, but I never really do that)
2 teaspoons almond extract
1 vanilla bean (seeds scraped out from the bean) - don't substitute with vanilla extract or you won't get the same results as in the pretty picture below.
Tiny dash of salt
This recipe makes about 22-23 madeleines.
First, beat sugar, salt and egg with a whisk until they are yellow and thickened (5 full minutes with a whisk; OR if you have the luxury of a electric mixer, a minute or so). Stir in the vanilla bean paste and the almond extract.
Gently fold in the flour and melted butter in 3 additions each, alternating between the two.
It should look like this after you are done.
How awesome do those little black vanilla beans look?? Now, refrigerate the batter for 1 hour (or up to 12 hours).
Preheat the oven the 375 and coat your madeleine tin with Pam or melted butter (I used Pam... smuggled in from the US). Drop one heaping tablespoon of batter into each mold.
Try not to lick the bowl.
Bake 10 minutes or until the edges begin to brown.
Gently remove from pan with the help of a butter knife and let cool. (Let the pan cool before starting the second batch).
In the meantime, begin the almond glaze.
Almond Glaze
Ingredients
1 and 1/4 cup of powdered sugar
3 tablespoons of milk (I used 2%)
1-2 tablespoons of Almond extract (depending on how strong you like the taste).
Whisk to combine ingredients and drizzle over the cooled madeleines with a spoon.
I also left some plain without the glaze and just dusted with powdered sugar.
Serve on a pretty silver footed tray.
And then try not to eat them all at one sitting.
I think pumpkin spiced is a must try for Fall. What flavor will you make?
Labels:
Recipes
Thursday, September 15, 2011
Oldie but Goodie
This recipe has been in our repertoire for years and one of our favorites. Great jumping off point to get back into the swing of cooking. We watched "Giada's Dating Tips for a Bachelor" a couple years ago and I was hooked at brown butter (more like brown booter in the words of Giada).
The best part about making this dish in Paris are the two Italian stores on our street that sell home made ravioli. Cest magnifique!
Brown Butter Balsamic Ravioli
Ingredients
1 box of cheese ravioli (you can use any kind you want really, mushroom, spinich, etc... naturally, we use the most fattening kind)
6 tablespoons of salted butter
2 tablespoons balsamic vinegar
pinch of salt and pepper
*1/3 cup chopped walnuts, toasted (put in the oven or over medium heat on the stove for about 5 mins)
Grated Parmesan cheese
*Optional
Directions
In a medium to large saucepan cook the butter over medium heat, stirring occasionally. When the foam subsides, and the butter begins to turn a golden brown, about 3-5 minutes, remove from heat. Let cool for a minute and then add balsamic vinegar, salt, and pepper. (Sometimes I also add some garlic salt).
Meanwhile, bring a large pot of salted water to a boil. Add the ravioli and cook 4 to 5 minutes, until al dente, stirring occasionally and then drain.
Transfer the ravioli to the pan sauce and Sprinkle walnuts. Put back on the hot stove (but do not turn the eye back on) and let cook together for a minute or two to let the sauce fully absorb into the pasta and walnuts. Serve with Parmesan cheese for people to sprinkle on top. Voila!
Note: Timing is the hardest part of this recipe. Ravioli (especially good ones) are really fragile and if they sit in a strainer they will stick together. Make sure your sauce is done before draining your ravioli.
Bon appetit!
*Recipe adapted from Giada De Laurentiis, photo courtesy of the Food Network
Labels:
Recipes
Tuesday, June 28, 2011
Trente minute meals
Life gets busy and hectic, even in Paris. Fashion week approaches and we are feeling the anxiety of leaving the City of Lights yet again for most of July and August. Oh, and did I mention it is over 90 degrees?
Here is one of my new favorite quick fix dinners (adapted from recipe I found on bakedbree via pinterest).
Honey & Rosemary Balsamic Chicken
2 Boneless, skinless chicken breasts
2 T. butter
S&P to taste
1/2 cup chicken stock
1/4 cup Balsamic
1 teaspoon honey
1/4 cup white wine
1 garlic clove, minced
1 teaspoon rosemary, minced
1/4 cup heavy cream
Rinse chicken and pat dry with paper towel. Season with salt and pepper. Melt butter in small saucepan over medium high heat and cook chicken until evenly browned, about 7 minutes on each side. Remove chicken to plate and cover with aluminum to keep warm. Add remaining ingredients and use wooden spoon scrap brown bits off the bottom. Cook 5 minutes or so until sauce has reduced. Stand 5 minutes to thicken. Cut chicken and spoon sauce over the chicken and serve with a delicious side.
Photoed above with orzo with homemade pesto, which looks divine (if only the Mr. like orzo... or pesto). We enjoyed with croquettes pommes de terre picked up from a shop down the street.
Labels:
Recipes
Friday, June 24, 2011
Juin Recette
Potato Galette
Indulge.
The steps seem a little daunting at first, but if you get through this recipe once, you'll see it is really pretty easy....and totally worth it.
Ingredients
3 golden potatoes (try to find a few skinny ones)
5 T. unsalted butter (melted)
2 T. flour
1 t. salt
1/2 t. pepper
1 t. rosemary
Adjust oven rack to lowest position and heat oven to 450 degrees. Place potatoes in large bowl and fill with cold water. Using hands, swirl to remove excess starch. Spread potatoes onto kitchen towels and thoroughly dry.
Whisk 4 tablespoons butter, flour, salt, pepper, and rosemary together in large bowl. Add dried potatoes and toss until coated. Place remaining tablespoon butter in shallow 10-inch ovenproof nonstick skillet and swirl to coat. Place 1 potato slice in center of skillet then overlap slices in circle around center slice, followed by outer circle of overlapping slices. Place remaining sliced potatoes on top of first layer, arranging so they form even thickness
Place skillet over medium-high heat and cook until sizzling and potatoes around edge of skillet start to turn translucent, about 5 minutes. Spray 12-inch square of foil with nonstick cooking spray. Place foil, sprayed side down, on top of potatoes. Place 9-inch cake pan on top of foil and fill with 2 cups pie weights. Firmly press down on cake pan to compress potatoes. Transfer skillet to oven and bake 20 minutes.
Remove cake pan and foil from skillet and continue to cook uncovered until potatoes are tender and browned on the top, about 25 minutes.
Once removed from the oven, place cutting board over skillet. With hands protected by oven mitts or potholders, using 1 hand to hold cutting board in place and 1 hand on skillet handle, carefully invert skillet and cutting board together. Lift skillet off galette and voila.
Using serrated knife, cut into wedges and serve immediately. For maximum experience, serve with peonies.
*Recipe adapted from Cooks Illustrated
Labels:
Recipes
Wednesday, May 4, 2011
How to Roast a Duck
In case you haven't discovered, Gwyneth Paltrow has a fabulous blog called GOOP. She recently published a new cookbook and posted one of her recipes on the blog. In love with duck after our trip to the southwest, we decided to give Gwyneth's duck ragu recipe a whirl. (Click here for Gwyneth's recipe). It looked simple enough until I came to the roast the "whole duck" part.
| Duck Ragu |
After a couple of luckless grocery store trips searching for a headless duck, I had no choice but to take the plunge and buy a head on, feathers intact duck from the boucherie. Even though my knowledge of the French language hasn't vastly improved, apparently my non-verbal communication skills have. By the time I left the market Wednesday, I picked out a duck, had it's head and insides removed ( the word "coupe" and a little hand to neck knife gesturing did the trick), seared with a blow torch, and it's little tiny liver sliced and reinserted into the cavity (ok, maybe that was the butcher's idea, but still! I was quite proud of myself). And I thought I would never buy a non-headless bird... please.
And that was the most difficult part of the entire duck roasting process. If you live in a country where you speak the language and know how to drive your car to grocery store, how to roast a duck is going to be the easiest thing you've ever learned...
How to Roast a Duck
First, make sure you buy the duck without a head and insides removed (otherwise, consult Julia Child or something a lot more sophisticated than this blog). Once you find the duck and it is sitting on your counter, preheat the oven to 350 degrees. Cover the duck in 1 tablespoon of olive oil and season generously with salt and pepper. Put in a roaster (or dutch oven) and roast in the oven for 2 hours, flipping the duck over every half hour. That is it. Oh, and once it is cooked take out the liver and toss or save and use to make a warm duck liver salad...or get really ambitious and use it to make pate. (Remember the chicken? Stuffing it with herbs and trying to figure out how to balance the oil and butter to create the best jus... etc... etc...). Duck is much more low maintenance. Not to mention the best part about roasting a duck... duck fat.
What to do with Duck Fat
Once the duck finishes cooking and you take it out of the oven, it will be sitting in at least half a cup of duck fat... the most delicious thing ever. It is divine for roasting potatoes or making matchstick french fries. (And the Mr. swears it is healthier than many other kinds of oils, which I sort of believe because I have seen duck fat french fries on several swanky menus lately). Here is my recipe for making duck fat matchstick french fries (I detest thick french fries, so I cut them as thinly as possible to resemble the size of a matchstick...technique I adopted from Ina).
Duck Fat Matchstick French Fries
Ingredients
1 long oval potato (we used golden potatoes, but I'm sure anything you have is fine)
1 cup of duck fat
1 cup of filler oil (canola, vegetable etc...)
Fleur de sel (or whatever salt you have)
Preheat oven to 350 degrees. Use a mandolin to slice the potato as thinly as possible, or slice by hand using a sharp knife (slicing across, but not all the way, as many times as you can and then down to cut into thin slices. sort of like you julienne and onion). In the meantime, heat 1 inch of oil in a large dutch oven or big pot on low (first use duck fat and if you need more, use the filler oil to reach the desired amount). As you slice the fries, place in a bowl of cold water. Once the entire potato is sliced, pat the fries with paper towel until completely dry.
Turn the heat up on the oil to medium high until it starts to sizzle (but not bubble). Adjust heat to keep a sizzle without letting it get too hot (I had it on about 7 of 10 when cooking the fries). Put half of the fries into the oil and cook for 4-5 minutes until crispy. Remove with slotted spoon onto paper towel to drain excess oil then put in a baking sheet to keep warm in the oven. Repeat to cook the second batch of fries. Season with fleur de sel (just a sprinkle) and serve. Serves 2.
Bon Appetite!
Labels:
Recipes
Friday, April 15, 2011
Printemps Dinner Party
Oh! And icing on the cake, the Mr.'s Aunt and Uncle happened to be in town and dropped in for cocktail hour. Two sets of guests in one night made for one big day for little 26 Rue.
So without further adieu.... Le Menu
Hors d'oeuvres
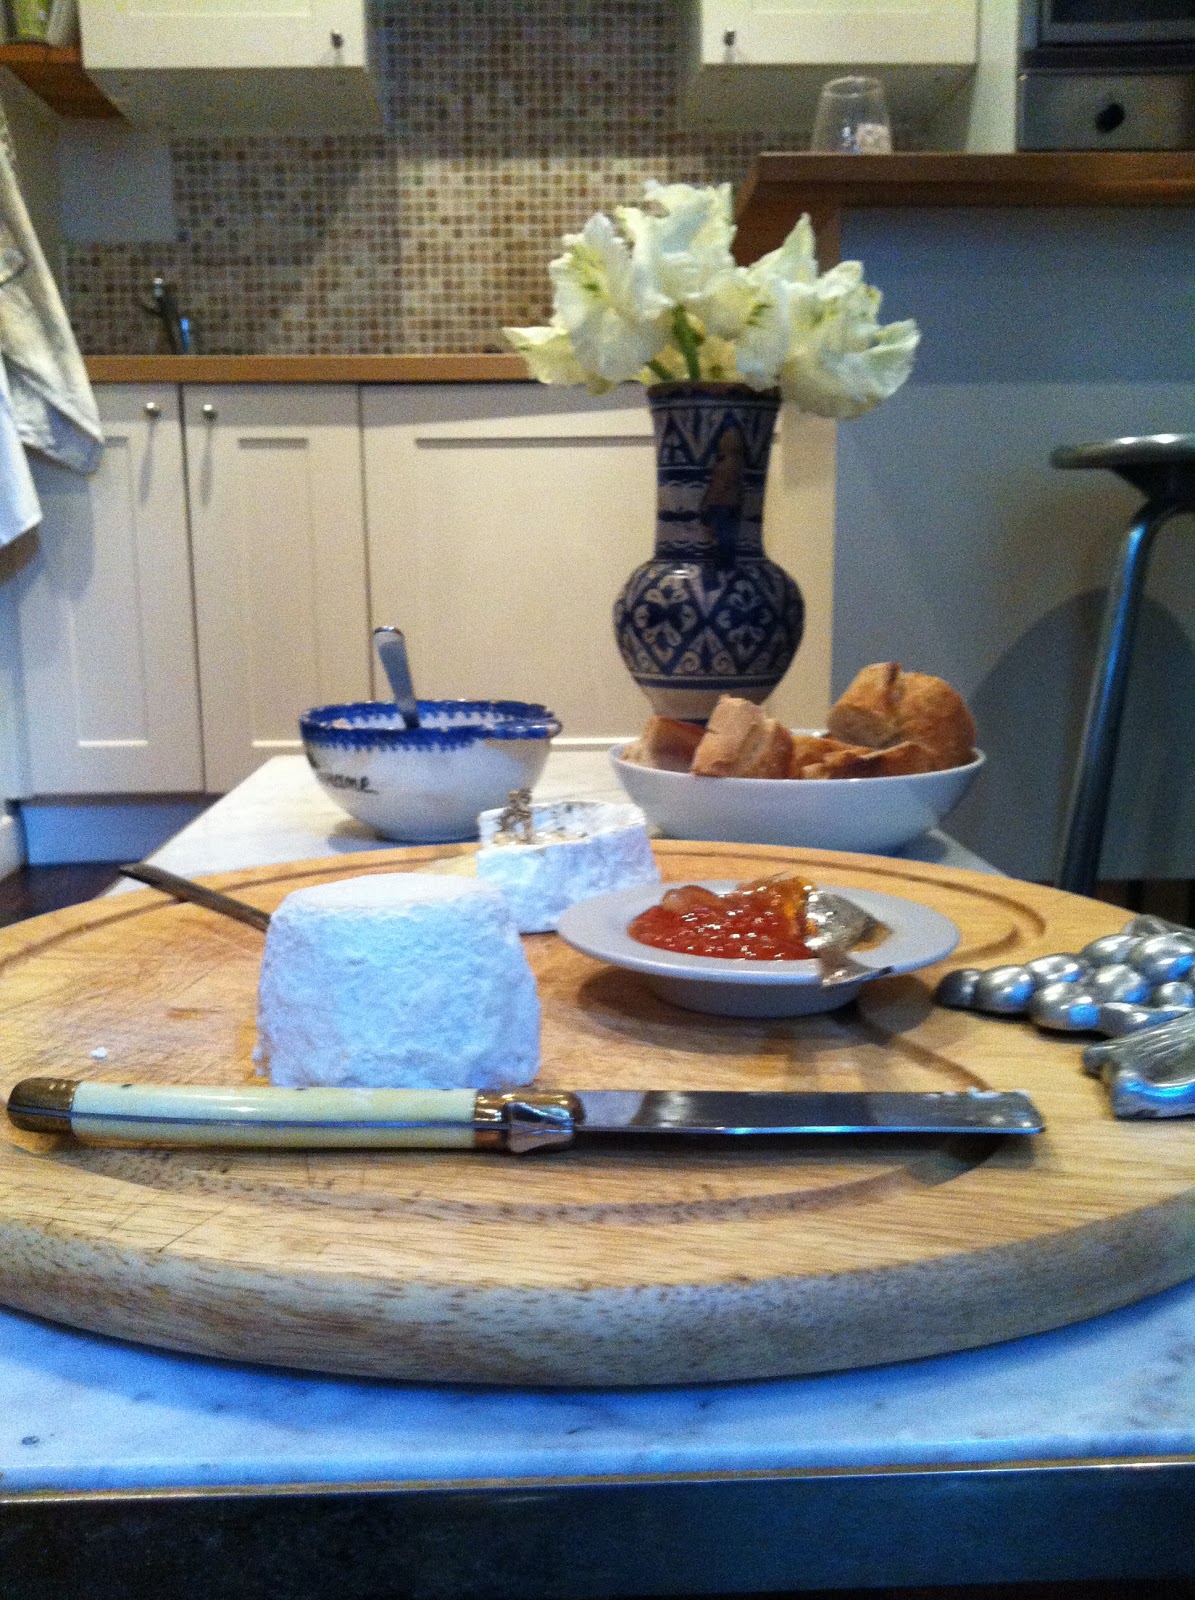
Crottin du Chavignol with a rose infused grapefruit jam
Baked Camembert with thyme and honey
Rillette du Canard
Le Dîner
Spinach salad with avocado, cherry tomatoes and a balsamic vinaigrette
Rack of Lamb with Dijon and fresh rosemary (courtesy of the Barefoot Contessa)
Mini ramekins of Truffle Butter Mac and Cheese (Frenchified version of my go to mac and cheese recipe)
Dessert
Lemon tart and noix tart (courtesy of our guests, Caroline and Peter)
| Crottin du Chavignol |
| Baked Camembert |
The star of the salad (along with the delicious dressing that only the Mr. and his mother can make.... believe me, I've tried... )
| Truffle Butter Mac & Cheese |
And of course I couldn't resist adding breadcrumbs, made with Poilane bread....
| Rack of Lamb |
This post is making me very hungry....but I just remembered that Aunt Cathy brought us some Poilane cookies!! (I swear, I literally just remembered them!! It's like finding a dollar in your pocket!! Love when that happens)
Buttery, melt in your mouth deliciousness.
So for the Recipes. They are all pretty easy. (Especially since I bought the cheese, jam, and rillette at a market... and used Ina for the meat... and the guests brought the dessert.... ) That leaves us with Baked Camembert and Truffle Butter Mac and Cheese.
Baked Camembert with Thyme and Honey
Ingredients
Wheel of camembert cheese
Thyme
Honey
Heat the oven to 400. Using a knife, cut a few slits into the top of the camembert cheese wheel. Sprinkle with thyme and insert sprigs of thyme into the slits. Bake for 10 minutes. Remove and drizzle with honey. Serve with slice baguette or anything similar you may have.
Truffle Butter Mac and Cheese
This is simply an enhanced version of my normal "Fancy Mac and Cheese" Recipe. I note how to make truffle butter below.
Fancy Mac and Cheese
Ingredients
1 box of cellentani noodles (or penne, whatever you have)
vegetable oil
1 box of cellentani noodles (or penne, whatever you have)
vegetable oil
4 cups milk
1/2 cup flour
1 stick butter (or truffle butter if desired)
1 T. salt
1/2 t. nutmeg
1/2 t. pepper
1 block gruyere shredded (1/2 lb)1/2 cup flour
1 stick butter (or truffle butter if desired)
1 T. salt
1/2 t. nutmeg
1/2 t. pepper
1 block white cheddar shredded (1/2 lb) (getting good, quality cheese is key)
5 slices of bread
Heat milk on med-low. In the meantime, melt 6 T.'s of truffle butter and then add flour whisking constantly for 1-2 minutes. Pour in heated milk. Add salt, pepper and nutmeg. Cook on med-low for a few minutes then remove from heat and add shredded cheeses (there should be more cheese than sauce). Pour noodles into the sauce and mix. Transfer the mixture into casserole dish. To make the breadcrumbs, cut crusts off the bread and put in a food processor. Heat the remaining butter in small saucepan and add the breadcrumb mixture. Spread onto pasta dish and cook 30 minutes in the oven on 375 degrees.
*No white chedder in France... so I substituted Asiago and it was just as good.
Truffle Butter
Ingredients
Stick of butter - room temp
1 T. White truffle oil
Fleur de sel, to taste
Mix butter, truffle oil and fleur de sel in a mixing bowl until combined. Place in ramekin and cover with plastic wrap. It should keep for a few days; otherwise, freeze.
Labels:
Entertaining,
Recipes
Wednesday, March 30, 2011
Don't Judge a Book by it's Cover
Oh what Frank (Sinatra), a glass Cotes du Rhone and some roasted garlic will do for a girls spirit.
I was feeling tres unproductive today as I have been addicted to my new book (which isn't even good, "The Paris Wife" ... I know, I'm such a sucker for titles. It's about Ernest Hemingway and his wife during their time in Paris. Sounds great right? I'm at page 298 out of 400 and nothing has yet to happen.) Anyway, after a very lazy day, I decided making a time consuming French recipe would make me feel like a contributing member of society. I picked up a new French cookbook the other day and am determined to try most of the recipes before I leave this place so I decided to delve into my first challenge: Roasted Chicken with 40 Cloves of Garlic (I had a headache just thinking about that much garlic).
So, I began with finding the right bird. My first stop was Marche du Passy. They carry only the freshest things and there are 2 different butchers in the the marche. Unfortunately, all of the chickens still had heads attached and that just looked way to complicated. On to the the Monoprix (normal grocery store). The chicken was astronomically expensive but at least it didn't have a head so I decided it would do. I think that was actually the hardest part of this recipe. As daunting as the title may sound, it is actually one of the easier meals I've cooked in a while. Here is the recipe:
Chicken with 40 Cloves of Garlic
Ingredients
2 celery stalks, including leaves
2 sprigs of rosemary
4 sprigs of thyme
1 chicken
40 garlic cloves, unpeeled (key word! unpeeled)
1 T. olive oil (plus more for coating chicken)
1 C. white wine
1 carrot, roughly chopped
1 small onion, cut into 4 wedges
1 baguette, cut into slices
Preheat oven to 400 degrees. Put one chopped celery stalk, one sprig of rosemary and one sprig of thyme into the chicken cavity. Add 6 cloves of garlic. Tie legs together and tucks wing tips under.
Brush chicken lightly with olive oil and season well. Scatter 10 more garlic cloves over the base of a large casserole dish. Put the rest of the herbs, celery carrot and onion in the casserole.
Put the chicken in the casserole dish on top of the herbs and vegies. Scatter remaining garlic around the chicken and pour in olive oil and white wine. Cover and bake for 1 hour and 20 minutes.
Carefully lift chicken out of the casserole dish to a cutting board. Strain the juices into a small saucepan and use a pair of tongs to pick out all of the garlic cloves from the strained mixture. Spoon off the fat from the juices and boil for 2-3 minutes until it reduces and thickens.
In the meantime, slice the baguette and drizzle slices with olive oil on a baking sheet. Toast the slices in the oven (same temp is fine) until just toasted. Cut the chicken into serving portions and pour some of the juices on top and scatter with garlic. Serve the chicken with the toasted baguette slices. The best part is squeezing the soft roasted garlic onto the baguette slices. Perfect compliment to the juicy chicken!
My first stab at this recipe went pretty well. I was a little disappointed that the jus from the chicken was not darker. I will have to figure out what to change to make this happen next time! My favorite part of the whole thing is the delicious roasted garlic. I must admit, next time I may by a delicious rotisserie chicken down the street and just roast some garlic! I know it would taste just as good, if not better... and it would be cheaper. Nevertheless, nothing beats a therapeutic night in the kitchen.
Labels:
Recipes
Wednesday, March 23, 2011
This is an old post... that got lost. Sorry if it is old news to you. Something new soon! Right when the sun goes away...
Coquille St. Jacques with Truffle Beurre Blanc and Sauteed Mushrooms
To celebrate my entrance back into the world of the living, I decided to get back in the kitchen and cook an elaborate dinner (nothing like a good round of food poisoning to get a girl back into the kitchen). I've been dying to try my hand at something definitively French, so I opted to take a stab the iconic French butter sauce. And since truffle oil makes everything taste better, I used that as my safety net in case it was a total disaster in terms of consistency. Coquille St. Jacques is the French word for scallop, which simply means St. James shellfish.
I must admit, it took me a few loops around the Marche du Passy to find these elusive Coquille St. Jacques. (Marche du Passy is a big market on the corner of our street full of freshness. Fresh seafood. Fresh meat. Fresh flowers. Fresh vegetables... etc... It's fab). At the Whole Foods in DC the scallops were always laid out on ice in ready to cook form. But that would be WAY too easy for France. And way to fast. So when I finally spotted the giant shells labeled "Coquille St. Jacques" it all made sense. After a little pointing, a little Frenglish and little gesturing, the nice lady at the sales counter proceeded to prepare some scallops for me.
Now that we have that fun little French market story out of the way, it's time to get cooking. We will start with the easy one.
Sauteed Mushrooms
1/2 pound of button mushrooms, quartered
Butter
Olive Oil
S&P
Very easy. Heat the butter and olive oil in a pan. As much as you want really. I used about 2 tablespoons of butter and enough olive oil to coat the pan. Add mushrooms and cook over medium heat until they are golden brown. Stir occasionally to cook evenly. Add salt and pepper to taste. 2 servings.
Truffle Buerre Blanc
4 T. unsalted butter (cold and quartered)
1/4 C. white wine
1/2 T. shallots, minced
S&P to taste
Truffle oil, a few drops
The toughest part about this sauce is timing and keeping it at the right temperature so that it holds its consistency. Heat shallots and white wine in a medium saute pan over medium high heat. Simmer until the wine reduces by about two thirds. Turn heat down the the lowest setting and whisk in one tablespoon of butter at a time. Whisk until each tablespoon is emulsified and then add the next. Add salt and pepper to taste and a couple drops of truffle oil. Spread a thin layer onto each plate and top with scallops (or anything you want!). This makes 2 to 3 servings.
It was actually much easier than I expected. However, the consistency started to deteriorate once I started the scallops. I need to consult Julia Child on solving this one. (In fact, I am off to the bookstore after this post!)
Seared Coquilles St. Jacques
Scallops
Oil
Lemon
S&P
If that picture grosses you out, I am totally with you. I had no idea how much work it took to get to the scallop! If you buy scallops in the US, they typically come ready to cook. If you buy scallops here, there is twice as much work to do for half the amount of mussel and about twice the price. But, so is France. So, once I removed the beard (the orange looking thing) and washed these suckers, they were FINALLY ready to cook. The actual cooking is the easy part.
Season the scallops with a little bit of salt and pepper and some fresh lemon juice. Heat a pan over medium high heat. Once hot, but not smoking, add a little oil and butter. Reduce to medium heat and sear scallops on each side for 1 to 2 minutes depending on the size (ours turned out to be pretty tiny, so I seared them for 1 minute on each side). Plate them on top of the beurre blanc and spoon up the mushrooms and you are ready to go.
I realize that never have any pictures of the completed product. The reason for that is that I am always to hungry to stop and take a picture and you can forget about the Mr. letting me get a camera near his plate. It will happen one of these days.
Labels:
Recipes
Subscribe to:
Posts (Atom)